Showing posts with label regency fashion. Show all posts

Wednesday, September 6, 2017

Sense and Sensibility drawstring dress and Washington Regency Society's Tall Ship sail

It was that time of year again! Time for a fabulous picnic and lovely sail on The Lady Washington. Taking place in picturesque Port Ludlow, Washington.

We decided to make a weekend of it and reserve a hotel room in Port Townsend at Manresa Castle. Saturday was the picnic and sail and Sunday was for shopping in Port Townsend. I have been trying to build a nice Regency wardrobe so I have choices for events. I made two new dresses, one new spencer and a silk bag hat.

For the sailing day I made Laughing Moon's drop front gown (again) in a paisley print cotton shirting. I have a total love affair with this pattern going on. It makes such a pretty dress! I had been looking at Regency fashion plates to get some ideas for an easy spencer to make. I noticed some really cute open front spencers. I decided to hack my Laughing Moon spencer pattern and create my own open front pointy spencer. I used a pretty navy blue linen from Fabrics-store.com. Since I knew this was going to be hanging open I bought enough linen to line the front bodice pieces. The rest of my lining was some basic black cotton. I used some scraps of checkered silk taffeta and broke out Butterick 6397 Making History hat pattern. I used view A the Edwardian bag hat pattern. It went together easily.


On to Sense and Sensibility drawstring dress pattern!

Pattern:

The Elegant Lady's closet. Drawstring dress AKA round gown. Several sleeve options. Sizing is somewhat flexible. Also included is a crossover bodice pattern.

Fabric, size and alterations:

This was basically going to be a wearable muslin. I had some ok quality pink striped shirting in my stash. This dress is hard to muslin because of it's flexible sizing in the front, but he back is fitted so that's what makes it a bit tricky. I went by my bust measurement and made the size 22.

I did zero alterations. NONE. Yeah...... how often does that happen. The only thing I will do differently is lengthen the skirt. Oddly it runs a bit short even for me (5ft 4in).

Construction:

I was a little baffled by the front only lining pieces (flaps). Not sure their purpose so I asked around. They help hold the front of the gown in place. Mine are just pinned closed. And yes, they really do help hold the gown in place.

I chose the 3/4 sleeve. It is nicely fitted without being super tight. If you normally have to do a full sleeve adjustment I would make a muslin of the sleeve and check for fit. I have average middle aged lady arms and didn't need one.

Setting in those sleeves.....I normally don't have sleevil issues. I do ok with them. This pattern has sleeves that go farther back onto the shoulder area. There is a weird little angle in the back shoulder area that you have to finesse. Now S&S does warn you in the instructions about the sleeves since this is based on a period dress. So I finessed the hell out of them. There were a few ripped seams and minor frustrations but I did get them sewn on. I still feel they are not perfect but I do not find them awkward or uncomfortable.

Final thoughts:

I like my dress! I didn't have any problems with the instructions. Other than the sleeves I found this dress easy and quick to make. You may have less finessing in the sleeve area if you go with the short puffy version. Gathers can cover a multitude of sins. ;-) You will really want the back of the dress to fit correctly. If it doesn't it may not be comfortable to wear. This pattern is in the running for a ballgown. It's got some competition with another pattern but.......I haven't made a choice yet. I will muslin the other gown first. This would also be a great dress to use under a open robe. If I did make a ballgown out of it I would also make an open robe. Just to gussy to up a bit. I highly recommend this lovely little pattern!

On to the pictures!

 Saturday Sail! Laughing Moon 126 gown and 129 spencer (hacked)


 The lovely Countess!

 Adventure selfie!!

 On the lady Washington for the evening sail.

 The Hawaiian Chieftain in the distance.

 Exploring Port Townsend wearing the Sense and Sensibility gown.


 At the end of the day I asked the Countess to take some pics in front of Manresa Castle. S&S dress with my hacked LM 129. 


Well summer events have wrapped up and now we move on to fall! My boys are back in school and the house seems too quiet. There will be some more Regency sewing on the way and also planning for VicFest 2018. Time flies by so quickly! Thanks again for stopping by and reading my little blog!

Instagram multi shots!!! ;-)


Wednesday, July 19, 2017

Jane Austen Appreciation Day WRS outing!

This last Sunday was The Washington Regency Society's Jane Day. We had been invited to the Seattle Public Library for a few hours to wear Regency costume and talk about Jane. It also enabled us to meet some potential new members! We had a great time and The Countess brought costume accessories etc....for people to try on.  Much fun was had by all, even Flat Jane our cardboard mascot. ;-)

We followed up with a WRS meeting at The Fairmont Olympic Hotel after our library adventure. There were snacks and booze on the menu. Plus it was happy hour! Drinks and food are served in their fancy lobby with plenty of comfortable seating.


 Flat Jane selfie!

 Just us two wallflowers.

 The darling Ms. K

The Countess as bad boy Mr. Wickham!

 And as Elizabeth!

 Oh dear! Two Elizabeths! Well, the naughty Liz for Mr. Wickham and the nice Liz for Mr. Darcy. Naughty Liz is on the right! ;-)

 At the Fairmont Olympic in Seattle.

 Patterns used--La Mode Bagatelle faux drop front dress in white clip dot with an underdress of yellow voile. Spencer is the cross front pattern by Laughing Moon patterns without sleeves. Bonnet pattern is the small brim Regency bonnet by Lynn McMasters. If you are going to make your first Regency bonnet I highly recommend the small brim version of this pattern. Use the gathered brim pattern piece for an easy brim finish.

Myself and the always lovely Countess! She has named this outfit of mine Buttercup.

I would just like to add that in the last two years of my costuming adventures I have met some of the most wonderful people! I am grateful for my new found friends! If you reside in the greater Seattle area and are interested in historical costuming here are some great groups:

WRS The Washington Regency Society
SITU Somewhere In Time Unlimited
Puget Sound Historical Costumers Guild

For the re-enactors set:
Northwest Colinial Re-enactors Association
WCWA Washington Civil War Association
Reenacting is a different animal from historical costuming. However, these groups don't mind us costumers showing up a civilians to their events wearing appropriate period costumes.

All of these groups are on FaceBook and have their own websites. I am to lazy to post links.


Friday, January 13, 2017

Wingeo Regency Turban pattern WN714 Mimi's green silk turban

I have a love hate relationship with Wingeo patterns. The directions can be a bit sparse and the illustrations are sometimes odd. But....They offer a good jumping off point. Especially for people like me who don't draft their own patterns. I would highly recommend Wingeo for theater costumers.

This pattern went together much easier than the Regency stovepipe hat I made. The pattern consists of 3 pieces. The inner band (buckram), crown, lining. The wrapped pieces are long rectangles. The dimensions depend on what type of fabric you use. This pattern uses no wire. (Yay!)

Size and supplies:
I made the size 23. Cuz I have a big head. This style of  headdress runs large because it needs to sit down on your head. The 23 was perfect. My advice is to cut the largest size and make the headband fit your head size. Like a quickie muslin. I used heavy buckram, green silk taffeta, black cotton lining. Wingeo patterns don't ask you to mull the buckram. I like to use mull so I used some cheap flannel and just mulled the buckram band.

Construction:
Fairly straightforward. Their directions are handwritten and sometimes hard to follow. But I kind of do my own thing so I don't mind. I hate it when pattern designers try to micro manage me. Not a problem with Wingeo. They appeal to my free spirit.

Changes I made:
I used only 1 color fabric instead of 2. Also instead of hemming the long edges of the twisted drapes I just sewed them into long tubes and turned them right side out. I wouldn't recommend this for very thick fabrics. Worked for the silk taffeta just fine. That's it.

Final thoughts:
I recommend this pattern for a confident beginner who is new to headwear. Goes together in a couple hours and the handwork is minimal. Just have all your feathers and stuff ready. You could have a nice Regency turban in no time. You can leave it simple or gussy it up. I just used a pre made feather and jeweled piece for mine.

I will actually be wearing this with my fancy Titanic era dress, not Regency. But this style is pretty timeless so I will also wear it with Regency. How nice and versatile!


Saturday, November 26, 2016

Wingeo WN719 Regency Stovepipe Bonnet

I really love this hat. I need another. This has a similar look to a 20s cloche except it is much taller. I can rock a 20s cloche and think this hat is looking pretty fine on my head! On to the pattern!

Eh........I have other patterns by Wingeo. Their patterns are pretty basic and instructions minimal. I consider their patterns more for theater level costuming. Their clothing patterns tend to have overly large arm openings and lots of ease. This hat was no different.

Pattern Info:
Three piece pattern, crown, hat body and brim. There are separate pieces for the hat fabric with added seam allowances. The directions are printed on the pattern paper, no separate pages.

Supplies used:
Heavy buckram, silk fabric, cotton batting (mull) and heavy sew in interfacing for the brim. The pattern does not call for mull at all. I used it as my main fabric that goes under the gathered fabric. Why waste good fabric no one will see anyway. This pattern does not use wire.

Making the hat:
Think of this pattern as a guide with pieces. As far as sizing goes you are on your own. First off this hat comes in several sizes. S-L. This hat runs really large. Now that being said, just like a cloche this hat needs to fit down on your head. You will want some ease room. Make a muslin. I used the size medium and I can fit a finger up inside the hat when I am wearing it. I have a 23 inch head FYI. My first hint of an issue is when I noticed the crown was smaller then the hat body. I went to sew it on and I had about an inch of excess hat body. Its buckram, not like I'm gonna be able to ease it. So I had to make the hat body an inch smaller. Luckily this pattern is large to begin with. Got the crown attached and the hat still fit. Yay! I used the batting to mull my really crappy looking buckram hat form. It was pretty sad looking. Once it was mulled I decided to forgo the sparse instructions and lay some Lynn McMasters style all up in that bitch. I gathered up the crown fabric and hand stitched it to the hat. Then I gathered up the hat body, folded in the top seam allowance and hand stitched in to the crown and basted it at the bottom. Well you know when you change the size of the hat body you are going to be changing the brim size too. Did that. I hand stitched on the brim as well. This pattern calls for no lining at all or a hat band. You fold up the under brim and stitch it inside the hat. Yeah no. I cut a lining piece using the pattern piece for the hat body. Folded up the SA and stitched it in the hat. I put a drawstring at the top of the lining and gathered it up. You can only see a bit of the buckram crown when you look inside the hat. Then decorating!! Have fun!

Notes and advice:
As you are making the hat try it on periodically. You will probably need to make adjustments. Lol. Even the instructions tell you to adjust before attaching this or that. I knew I was on my own at that point.
Cut the crown at the largest size, you can always trim it to fit.
Use a good quality heavy sew in interfacing for the brim. I used Sew Lazy heavy sew in.
I would recommend mulling the hat crown and body with flannel or batting.
Sew most of it by hand. I only used the machine to gather the hat fabric.
Make a lining, your head will thank you.
Cut out your brim as usual. I pinned it and started stitching at the CF. First to the right then to the left. I stopped about 1.5 inches from the CB on each side. Then I could see where my adjusted brim seam needed to be. Stitched the brim seam and finished attaching it to the hat. No guess work or math. Easy Peasy.

Final thoughts:
I am really glad I stuck with it. As I was putting it together I was thinking "wow, this is ugly". It's really not. I love my new ridiculous Regency hat!


Monday, November 7, 2016

Yay! Washington Regency Society Hunt Tea & Laughing Moon patterns 129 130 & 126

WRS had a fabulous high tea in Seattle. It was a gorgeous day and a really fun event! It seems like I am making a Regency wardrobe even though I never thought I would wear Regency. I am actually enjoying it! Plus it is really fun to make and doesn't take up as much fabric as some of the other eras.

Laughing moon #129/130 a mash up:

I wanted to make a 3/4 length fur trimmed pelisse for the tea. Thinking it would be cold (it wasn't). Plus I knew I would be commuting via bus. Yes, I was out in public, in costume, riding on the bus. It was Sunday morning and quiet. Just me and a couple drunks who probably thought they were hallucinating. I decided to use the spencer pattern from #129 (view B) and the skirt pattern from #130 (view C).

Pattern sizing and alterations:

LM Regency patterns I wear a size 22. In my stays my bust measures 44 and under bust measures 39. I shorten the bodice by 1/2 inch. The sleeves are VERY long. Part of this is a fashion style of the Regency era. But I am a bit more practical so I shortened my sleeves 1.5 inches. I was being conservative in my sleeve alterations because I wanted them to still have the overly long look of the era. That was all I did to the pattern. Simple and quick.

Sewing it up:

Very easy. This does not take overly long to make. I had zero issues with either set of instructions. No complaints. My next project will be a grey velveteen spencer.

Fabric and other details:

I used a lightweight wool suiting in mauve pink. I bought it from Vogue fabrics 2-3 years ago. I only bought 3 yards so I had barely enough to put this together. It is lined in mauve cotton sateen. I made two self fabric straps for the lower sleeves to tighten them up a bit. They are just tacked to the front and back of the sleeves. For the faux fur trim I cut strips of the faux fur and some black cotton. Both 6 inches wide by about 60 inches long. I sewed them right sides together making a fur/cotton tube. Once it was turned right sides out I hand tacked it to the hem. A bit time consuming but it turned out ok. My hand work is nothing to write home about, but I manage. I love this pelisse. It is such a happy color and a nice weight of wool.

Laughing Moon #126 drop front dress:

Well of course I needed a new dress for the tea party! Actually I only had one Regency dress so making another didn't seem too frivolous.

Pattern sizing and alterations:

Again, size 22. I chose the heavily gathered bodice instead of the less gathered one. My cotton Regency dress uses the less gathered one. I shortened the bodice 1/2 inch and the sleeves I shortened 1 inch. No other alterations.

Fabric and other details:

I had some royal blue and black checked silk taffeta. I had originally bought it for a Titanic era dress. Oh well. The long puff sleeve is actually 2 pieces. You make the puff sleeve and  then baste the long sleeve up inside the puff sleeve band. This way they are removable and you can change the look of your dress. How convenient! The dress went together easily and I had no issues with the directions.

Sewing crumbs of advice:

On the drop front dress I put 3 belt carriers on each side. It is easy to get kind of a rectangular shape in this dress due to the front/side front of the skirt sagging a bit. I found that 3 carriers on each side really helps with this issue. My first carrier is laced 2.5 inches in from the side front and the bottom of the carriers are placed on the waist seam. Also press the side panel pleats as flat as possible.

Oh the bonnet!! 

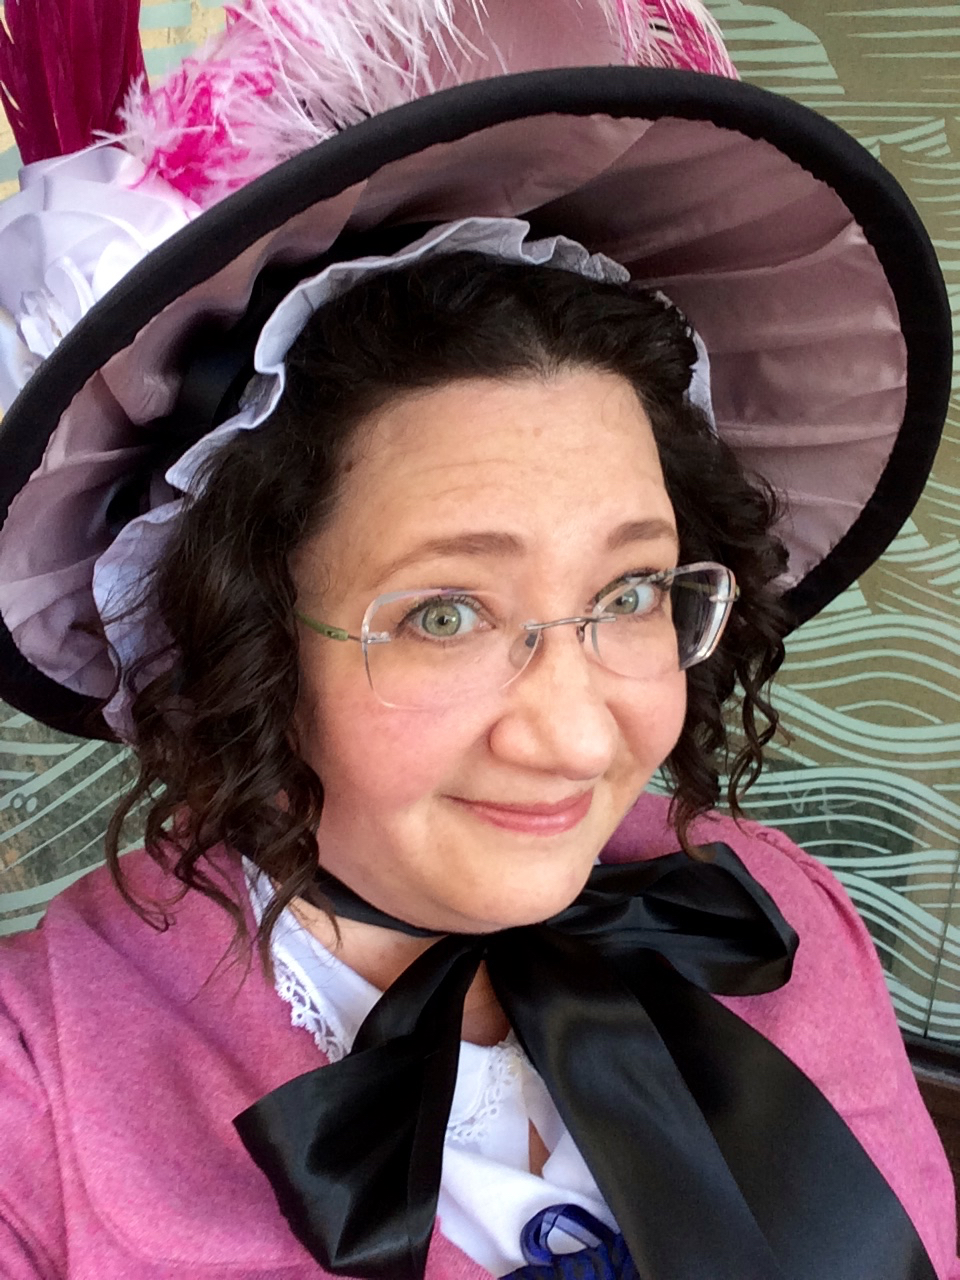
This is one of Lynn McMasters patterns for Regency bonnets. I used silk remnants, feathers and wide ribbon. I made the size large because I have a giant head. I would recommend some  hat making experience before making this one.


 Oh how I love the back pleats on a regency gown!


Waiting for Mr. Metro, who is much more reliable than Mr Wickham.


 Trying to do up my blasted pelisse!!


Some of the WRS ladies!

Oh! My! Goodness! Not a proper lady and never to be trusted around the Regiments.