Saturday, August 12, 2017

Colonial Festival and JP Ryans Caraco jacket!

It's that time of year again! Colonial Festival in Port Angeles, Washington! You must understand that out here on the west coast we don't get a lot of Colonial action. So it's nice to have one event that embraces that time in our history. I don't know if I will ever get to Williamsburg so this makes a great learning and dress up opportunity.

The George Washington Inn, Port Angeles, WA

I need more 18th century practical clothing. I thought about making another English Nightgown but I didn't want to deal with the pleating on the skirt part. I went through my stash and dug out JP Ryan's Caraco pattern.

Size and alterations:

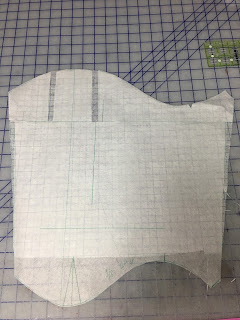
What sucked is I ordered the wrong size and never noticed it until I finally got ready to use the pattern. It was one size smaller than I needed. I bought the 14-16 when I really needed an 18. But I knew I was going to muslin it so if it wouldn't work then I would find another pattern. I whipped up a quick muslin and decided to add an inch to each front edge of the stomacher. I also carved out a bit on the front of the arm opening since they were pretty tight. I removed about an inch of the back length from neck to waist. It feels a bit short so I will not be so aggressive with my next one. For reference my back of neck to waist is 15.5 inches.

 The other thing that runs tight is the sleeves. I have average middle aged lady arms and they were snug. I did decide to try a different sleeve altering method just for fun. If you don't have Joi Mahon's Create the Perfect Fit book I highly recommend you buy it. She goes above and beyond the most common fitting methods. After creating my sleeve muslin I noted that the only room I needed was in the upper part of the sleeve and cap.
So I did this:

This gave me the extra room needed in both the sleeve cap and it added a bit of extra room along the length of the sleeve. I'm pretty damn happy with it! I didn't have any issues easing the sleeve into the arm opening either. Joi's book is pretty involved but it really breaks down all the fitting and makes it easier to understand. Instead of just throwing a full bust adjustment or full arm adjustment etc etc at everything as a fix all. Just like one size doesn't fit all, one alteration doesn't fit all either.

Fabric and construction:

I bought this decor weight cotton from Fashionable Frolic on Etsy. It was nice to work with and make for a sturdy but comfortable jacket. 

The pattern instructions didn't give me any issues. My only warning is be careful when pressing the center back seam open. It's cut on the bias and gets stretched easily. I wasn't careful so I have a bit of a pucker along my CB seam. Once I had the gown put together I finalized my fitting of the stomacher and sewed on my hooks and bars. The pattern wants you to sew hooks and eyes and have the two front edges butting together. I no no like that. So I decided to use hooks and bars and have a 1/4 inch overlap on the front edge. Because of the overlap I only used a single length of boning on the hook side of my stomacher. 

I highly recommend this pattern! I most certainly will make another in the future.

I didn't take a lot of pictures but The Countess is always happy to indulge my need for blogging my sewing experiences.

 Eve reaching for the apple.....Actually not an apple but that was my first thought.

 The polonaise effect with ribbon and buttons.

 Looking like a proper 18th century matron.

 The British are coming!!! Naw...it must have been time for tea and pastries.

 Lovely ladies, The Countess and Lady J.

 The Countess wearing her smashing ensemble! I was quite covetous of her very dramatic winged cuffs and quilted petticoat, that HUSSY! ;-)

 Up close! And yes, it is a quilted coverlet made into an 18th century petticoat.

Our dainty tea! We visited with our old friend Dr. Franklin; as well as Martha and George Washington. It was a very enjoyable day

Oops! I almost forgot! Here is my bum pad that I am wearing under my gown. It is from the Simplicity/American Duchess cosplay patterns. The fabric is completely historically accurate and by historically accurate I mean Daisy Kingdom cotton circa 1994. Daisy Kingdom in the 1980s-90s via Simplicity had a coordinating fabrics/patterns thing going on. There were two color ways for this particular fabric. YES! Yes, I have both color ways. It's freaking crazy quilt pre printed fabric! I love a good crazy quilt, even a faux one. 


Sunday, August 6, 2017

Still gettin down with the frumpy 1920s and Butterick 6399!

Ah, I am learning to love the 20s frump. It sort of grows on you. I you have been anywhere near the Pacific Northwest in the last week you know we have been hot hot hot. Bear in mind most of us PacNW peeps don't have AC in our homes so when the temps soar we get bitchy. Even with hot weather there were two events on Saturday that needed to be attended. Now initially I was thinking of trying to wimp out. However, my tough as nails friend The Countess, inspires me to "just do it" so off I went on our Saturday adventure. I was planning on dressing 1911ish but I was not feeling the corset love with the possibility of temps in the 90s. This is why the 1920s are the costumers friend.

How Butterick 6399 came to be:
I started B6399 for the New Deal Picnic. Actually it was almost done the week before that event and I hated it. It just looked Laura Ashley circa 1985 to me. The sash and big bow were just too much. Keep in mind that this is supposed to be an evening dress. I think the sash/big bow would work fine for the evening dress look; but for a cotton lawn dress it was too over the top.

Size/Alterations/Design Changes:

I am sort of smack between size 20/22 in pattern land. Seeing that this was going to be loose fitting (even the under slip which is described as close fitted) is still somewhat loose fitted. I decided on a size 20. For my 20s dresses I choose to wear a "leisure bra". Like I have ever worn a bra that made me feel like laying upon a fainting couch, eating bonbons and reading a novel full of long winded prose. Nope. However, they make good 20s bras. Ok here we go!

Alterations:
I shortened the skirt on the slip and dress by a couple inches. That sucker would have been a bit past ankle length on me. That is all I did.

Design changes:
This is where I got confused by the yardage requirements on the back of the envelope and had to read through the instructions to understand.

Costume Fabric:
This is for the underdress/slip.

Contrast 1:
Sheer fabric, like chiffon.

Contrast 2:
Scalloped lace.

Underdress;
So once I figured out what the chiffon was for I knew I wasn't going to be needing it. My under dress/slip has a cotton bodice and a China silk skirt. I would have like to make the whole thing of China silk fabric but I didn't have enough. I used petersham ribbon for the straps.

Overdress:
Double edged scalloped cotton lawn fabric with a micro black polka dot. The overdress has a very time consuming closure on the back scallops of snaps. Lots of little snaps to sew on. I skipped all that and made the overdress a pullover. The back neckline is finished with self fabric bias and my arm openings are just narrow hemmed. On my dress front the center panel is a rectangle of scalloped fabric sewn into the V shaped front opening. Then I trimmed it into a V shape after it was sewn in. The model dress on the envelope doesn't have a center piece in the V, that is the slip/underdress you are seeing (teal fabric).

Sash and big ass bow:
I didn't have any fancy fabric for the sash so I used a black cotton sateen. It went together fine but was just too heavy for a day dress. I made a narrow waist tie and added 2 belt carriers at the side seams. Works fine and keeps with the light airy look of my day dress. My belt could be a bit wider but I was in a hurry.

End Notes:
If you skip all the extras; like snappy closures, you can make this fairly quickly. I wound up liking this dress once I left off the sash and added the center front panel. It was super comfy to wear on a hot day. I will wear this one again for sure. If you have a really large chest and small frame I am not sure this could be a slip over. I have a large chest but the rest of me is fairly proportionate to it. If you make a muslin first you will know for sure. If I need a 20s style evening dress I would use this pattern again.

What events?!
Our morning started out with the Kent Historical Society's home tours. Then it was off to be costume judges for a SASS (single action shooting society) event in Renton. I don't normally take pictures at the SASS event because I am busy looking for good costumes. Also there is tremendous gun fire going on and it is a bit jarring. In spite of being spooked by gun fire like a skittish Shetland pony I did have a great time.


 A modern straw sun hat with a tacked on wide taffeta ribbon.

 All along the offset scallop seam is where the back closure is supposed to be.
 Enjoying the Japanese Mimosa tree.


 The Countess being surprised at her strumpet like behavior in her 1890s swim dress.

There was a little horseback riding at the SASS event. The Countess was the only one wearing bloomers for astride riding. ;-) 

Sash and bow. Meh on a day dress.

Under dress/slip. It closes in the back with 2 hooks and eyes.

In spite of my being completely ladylike The Countess awarded me with the best "soiled dove" certificate. She knows me so well.....;-) We didn't have any contestants for this category so I won by default. So you see, the frumpy 1920s is totally the sexy!