Showing posts with label 18th century gown. Show all posts

Monday, November 9, 2020

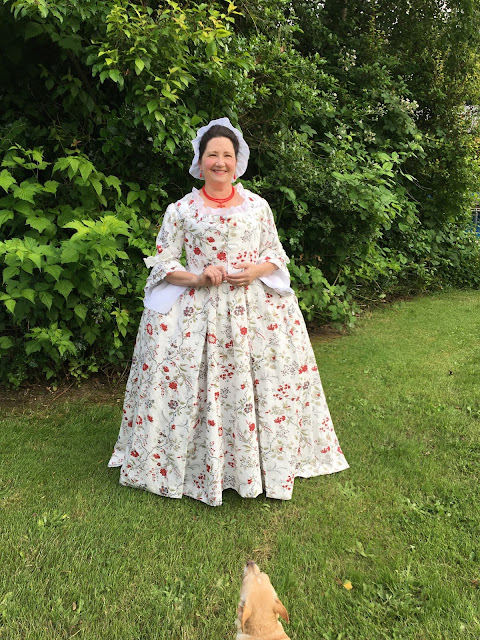
A silk Robe Volante using Mill Farms Casaque pattern!

I have had some lovely silk brocade in my stash for several years and it was time to use it instead of letting it languish. During the initial Covid shutdown my retail job became non existent so I used some free time to make things I normally would put off because, lazy. 

Mill Farm casaque is a pattern I have had for awhile. My plan was to camp during the Colonial Festival 2020 so I knew I would need 18th century "casual" wear. I had a well loved IKEA comforter cover I knew would work, Since the fabric wasn't expensive if the casaque didn't work out I would not shed tears over wasted $$$ fabric. Even though the camping never happened since the friend I was borrowing the tent from was unable to make the festival (due to Covid the festival became just an encampment) so I wasn't able to use my casaque, hopefully I will be able to wear it in 2021 or 2022! 

Making the casaque went pretty smoothly. The directions are.....scant at times so I just followed along as best as I could. One thing I found interesting about this pattern is the shoulder pleats are pressed towards the front. As I was perusing through some fashion books with (the fancy books with extant gown diagrams n shit)  it seems like both casques and the volante have their pleats pressed towards the shoulder. For the IKEA casaque I made it just as the pattern instructed. I knew for the I would want to press the pleats towards the shoulder. To be honest it just looks better that way.  Well, onwards to the silk volante.....

Contemplating the silk Beast:

I'm just going to start out by saying this was truly an organic project. Other than having a base pattern to work off of I had to decide how I wanted this to fit. Also in a perfect world I would have a grand pannier to wear under it but hell no I'm not making one of those. Instead I made a very petite pair of panniers that fit the cut of the gown very well. I think had I used a grand pannier I would have had to make changes to the sides and needed to add much more fabric. 

So here is what I decided I wanted:

1. lengthen gown to floor level with a slight train in back.

2. add a fitted inner bodice lining like sacque back gowns have.

3. have the pleats pressed towards shoulder.

4. try not to cry if this whole thing goes sideways. 

Starting:

I traced off the casaque pattern and lengthened it. The original Mill Farm pattern has a separate front facing but I decided to make the facing part of the main gown pattern piece. One less seam, baby!

Once the fabric was cut out I started the easy part, making the back pleats. That is always fun to see those beautiful pleats come together. I stitched the back pleats down by hand (I know!!! The real Mimi must have been kidnapped by aliens). Then I stitched the side seams and figured it was time to make the inner bodice lining. The lining would be mostly free floating and it's purpose is to help hold the outer gown in place. 

Lining:

I used my JP Ryan Sacque back gown lining pattern for my jumping off point. I traced it off and then made some neckline and armhole alterations to the back piece using the casaque pattern as a guide. Hey! I said this was organic and I have never done anything like this before. Once I felt the back lining piece was good to go I started on the fronts. I sort of did the same thing for the fronts I did for the back. I stitched the lining shoulder and side seams, ya know like ya do. I had made sure the shoulder was long enough but...yeah... I didn't check the front bodice lining length. I only realized the damn thing barely covered my boobs after I basted it in to the gown and tried it on. Bear in mind at this point in the game I still hadn't figured out the whole press front pleats towards shoulder and still be able to put in the sleeves without running into the pleats. 

 Now, because I'm lazy there was no way I was going to make a whole new fronts for the lining just because they were too short, so I pieced them (AKA adding the extra fabric where I needed it). Once the front lining was the correct length I stitched it just round the back of the neck and around the arm openings of the gown. The only points in the gown where the lining would be 100% stitched in would be the back of neck and armholes. The fronts would just be free floating and pinned together when worn. At this point all shoulder seams are still open on both the lining and gown because I still don't know what the hell I'm doing. Oh and just because it's funny and I'm a spaz, I accidentally stitched in the lining with the wrong side facing out 😐😑😐 *sigh*. Hell no I wasn't about to rip it out to fix that issue. It's in like that so it stays like that, because sometimes a girl just wants to watch the world burn....

Sleeves and Shoulders:

Once I had the lining stitched in I machine basted the shoulder seams and tried it on. The fit was good and the lining really helped hold everything in place. On to the sleeves!

I decided to jump into the Pinterest vortex and looks at 18th century paintings of ladies in volante gowns. It seems like they all have beautiful fluffy gauzy chemises worn under their gowns with the lace trimmed sleeves hanging below the gown cuffs.  I didn't really want to make a fluffy chemise so I made fake chemise sleeves that I tacked inside the gown sleeves. I trimmed the gown cuff with pretty silk ribbon and they were ready to go. My advice on sleeves, trim them before you set them into the gown. It's so much easier that way. Also I'm a big fan of hand basting in the entire sleeve before making it permanent. 

Attaching the sleeves was a challenge so I did the only think that made sense. I stitched the shoulder from the arm opening going in about .75 of an inch. I kept the pleats free until I had attached the sleeve. Because this was pretty awkward I stitched in the top part of the sleeve by hand and the underarm area was done by machine. After the sleeves were set I laid the pleats how I wanted them and folded under the seam allowance. Once done, I top stitched and whip stitched the rest of the shoulder down 😅. It looks a little coarse but at least my fabric has a busy pattern so the stitches aren't super noticeable. 

The rest of the gown was easy, if not cumbersome to finish. It's just moving around a buttload of fabric. I whip stitched the fronts together and added self fabric covered buttons. I did add a hem facing of plain white muslin. The entire hem was stitched by hand (shoot me now).....

I made the stomacher from some pretty yellow silk taffeta (Dandelion from Silk Baron). I trimmed with lace and matching buttons. When it's worn I just pin it in place to my stays and then pin the gown to it. I always enjoy the potential of stabbing myself with garment pins because I like living on the edge.

Pictures!


Hem facing.

Sleeve detail with faux chemise sleeve.

Shoulder join, hand stitched with pleats pressed to shoulder.

The pieced and unmatched lining with wrong side facing out. ;-) oops!

Top, original casaque using Mill Farms pattern. Pleats are pressed toward fronts. Below, volante version with pleats pressed towards shoulder.

Original Mill Farm casaque. Worn plain over my stays and with a quilted petticoat. Good to wear for reenactment/camp situations.


Well thanks for tuning in to my little slice of the world! I can't say I'm an excellent writer.  ( I really sucked at school except for art classes). However I hope that showing some mistakes, adventurous sewing and humor will inspire you to keep creating! :-)


Monday, August 10, 2020

Simplicity 8578 Part Two! IKEA curtains are the BOMB!

I have already reviewed Simplicity 8758 that I made for an event last year. This year I decided just for fun to make a version from four IKEA cotton ramie curtain panels. It is one of their historic prints and the fabric looks and feel like linen.

Each panel was 2.5 yards long by about 60 something wide. I was very careful in my laying out the pattern and making sure I would have enough fabric. I was left with nothing but scraps by the end.

This time around I lengthened the gown skirt so it was longer than the petticoat by about one inch in the front and that gave me a nice small train in the back. I kept trim very minimal since this is not an evening gown. I also had the stomacher open down the center and I just pin it shut. This would be perfect for a more casual evening meal or for visiting during the day. I have no place to wear it right now but I had so much joy in making it!


My sweet little dog! His name is Pancake.

Tuesday, August 4, 2020

Fig Leaf Pattern 112 The 18th century Italian Gown finished!!!

Well since I have more free time these days I decided to do some hand sewing. I have had this pattern since 2019 and it's been on my hit list. I have only made one other pattern by this designer and it was a simple Regency short gown (basically rectangles). I was feeling fearless and had some lovely IKEA cotton fabric!! Well, actually a comforter cover but..... ;-)


Pattern:
Fig Leaf 112 1780s Italian Gown. Pattern is created using an extant example in the DAR collection. Fig Leaf patterns are like a fashion history lesson in a package and certainly well worth the pattern price. A lot of gowns were previously altered as fashion changed and the pattern designer includes these optional alterations, piecing etc...on the pattern itself. Another nice thing is all the instructions come in a spiral notebook format.

FYI-----The petticoat is not a part of this pattern. I used the American Duchess book for that part. I mostly machine sewed the petticoat.

Fabric:
IKEA historic print cotton comforter cover for the gown and silk taffeta (Cosmos from Silk Baron).

Alterations:
First off you will need all the proper undergarments before you begin. Chemise, stays, under petticoats and a bum pad. Fig Leaf patterns are designed to be worn over stays etc... Read the size measurements carefully and pick closest to your size. If you fall in between sizes go up.

I made two muslins before cutting out the gown. Since I fall between 18 and 20 I went with the 20. It turned out to be too big, especially in the back. I went down to 18 and the fit was much better. I had to shorten the waist length (normal for me since I'm short waisted). I also knew I was going to be pinning closed so I kept the extra bodice width offered for pinning intact. I also did a small full arm adjustment on the sleeve. I need to shorten the sleeve a bit and will do that when I make this again. The gown is originally a round gown with the center skirt being a "faux petticoat" attached to the gown. I opted to make my petticoat completely separate because I wanted a different fabric. I used the American Duchess book for petticoat instructions. That is the extent of my alterations.

Construction:
Mostly by hand. This gown is not super difficult to make and the directions are straight forward. I don't recommend this for a beginner and it does help to have some 18th century experience. The construction methods are very different than modern day stuff. 

The most challenging part was setting the sleeves. My advice is to do it in two parts. Sew the underarm area first then try on the gown and make some shitty attempts without a fitting helper to get the sleeve cap to fit YOUR personal shoulder shape. I managed to get it done but not without some frustration. Not the patterns fault, just my own personal issues. ;-)

I used the sewing machine on the underarm and the long skirt seams. Otherwise everything else is done by hand.

Final thoughts:
Great pattern! It was a challenge but worth it in the end and I would certainly make it again.


Wednesday, March 4, 2020

18th Century Wagner House video!!!

I'm still super neglectful BUT the video from Vanessa's Wagner House event is up and going! My previous post reviewed the Simplicity 8578 and talked about the party. :-) I'm still thankful for my friend taking the time to plan such a fun event. I know it was a lot of work but it is so appreciated!

18th Century Wagner House event


Thanks again for visiting my little corner of the world!

xoxo Madame Mimi

Tuesday, November 5, 2019

Simplicity 8578 the American Duchess Sacque Back Gown pattern

It was a success! I have been wanting to make a sacque back gown since watching Dangerous Liaisons when it first hit the theaters wayyyyyy back in my youth. I tried unsuccessfully to make one almost 3 years ago and I screwed it up amazingly. I used the JP Ryan pattern (I love JP Ryan patterns!) but this style did not work for me. On her pattern the front of the gown is essentially draped and I could not get it to work at all. About a year after that I was reading Period Costume for Stage and Screen. The author mentioned the easiest style sacque to make was one with a separate front bodice piece. There is an older Simplicity pattern that is a sacque of this style and the stomacher closes up the middle with hooks and eyes. It's out of print but can be bought on the secondary market. However along came the AD Simplicity 8578 sacque and I rejoiced! It has the separate front bodice piece I was looking for. Yay!

Pattern info:

Pattern is for the gown and petticoat. You will need panniers, stays, 1 under petticoat to add fluff. The gown is a fabric hog and the yardage requested is fairly accurate.

If you want to cut down on yardage you could just make your petticoat out of two 54 inch widths of fabric cut to the length you need. You can find directions on line to make a basic petticoat. The petticoat in the Simplicity 8578 pattern has a center piece and two side pieces for front and back. Hence the (6ish) yardage requirement. Several of my fancy gowns just have a basic two panel front and back petticoat. My panniers are average size. At my height (5ft 4ish) I can usually get away with 2.5 yards of 54 wide fabric for one petticoat.

Fabric:

I used silk taffeta from Silk Baron. Gorgon for the gown and Regatta for the petticoat. As far as trim I decided to keep the petticoat solid Regatta blue so I can wear it with another gown if I want to. Of course that would require me to make another gown......

Size and alterations:

I made size 20, bust 42. I didn't do a lot of alterations. This style gown is somewhat adjustable in size because of the ties on the inside back and the stomacher. I also knew this would be my first go around with this pattern so I would only do basic fitting tweaks. I had to shorten the bodice about 1/2 an inch because it was a bit too long and looking pretty janky over my panniers. The sleeves are a bit roomy so I did a 1/2 inch thin arm adjustment (I do not have thin arms. Mine are average don't ever work out middle-aged lady arms.) That's about it.

Side note:

Something to check next time. In the pictures on the Simplicity web site the front of the gown is longer than the petticoat. Mine is just the opposite. The petticoat runs a bit long and I did take a pretty deep hem on it. I like the length but apparently it should be shorter than I have made it. Eh.....no biggie.

Putting it together:

No issues. It is a lot of fabric to move around and it gets cumbersome. The instructions are clear and concise. The back neckline gown to lining RST seam is fussy as hell and mine looked not too good when I was finished. Lol. It's the reason mine has trim going all the way around the back of the neck. For my stomacher I basted one side to the gown and sewed hooks and bars on the other side. It's very easy to put on.

Final notes:

I love my gown. It's not perfect but I am so pleased to have finally made my dream dress! I felt so elegant when I was wearing it! I highly recommend this pattern and I will make another at some point.

I made this gown because I was invited to an 18th century party at the end of September. The Countess was also in attendance as well as some of my other homegirls. It was a magical day & evening!


 The lovely Countess wore her beautiful new gown!


 Ready to greet the guests!

 A fabulous group photo before supper was served. 

After supper photo by In the Long Run Designs. They were so nice to work with!

 Playing cards and winning! 


During the picnic both The Countess and I had scheduled a photo session with In the Long Run Designs. I decided to wear my trusty JP Ryan green silk gown. The Countess also wore green so we were like twins!! Lol, it wasn't planned but we had fun with it anyways. Here are some of the pictures  from the picnic.

 The green chicas


Contemplating nefarious shenanigans.... 

 A stroll in the garden.

Defending my virtue! 


The Countess looking pretty saucy!

This event was one of the highlights of my year! I have made some wonderful friends in the last few years and I am truly grateful for the good times we have together.

Thanks for stopping by and sorry I have been SO VERY neglectful of my little blog.

Monday, June 10, 2019

18th century sewing Tailor's Guide pattern revisited and other activities!

Oooooooooo I have been SO LAZY regarding this blog. However, I'm here now so I may as well post something. :-)

I'm not really in a rut but I have been on a slight break with my costume sewing. I also sew modern clothing and my summer wardrobe was looking pretty sad. So I set aside some time to make new tops. I still have some additional items to make but I started to get bored with modern clothing, as you do. It's always a challenge keeping myself focused on current projects. My mind starts to wander. Lately it's been wandering to the 18th century.

Tailor's Guide gown, again:

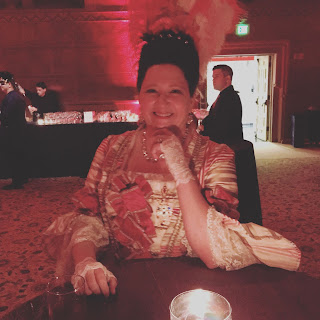
I have attended Vampire's Masquerade Ball for the last several years. It's in Portland, Oregon. This year they had a new venue! The Portland Art Museum. I decided to make a new 18th century gown because I totally need another......;-)

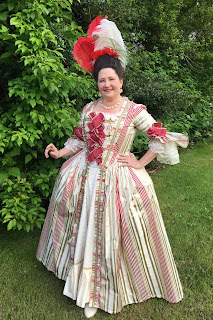
 I dug out my Tailor's Guide 1750-1785 gown & short gown pattern. I have already reviewed this pattern in 2016. I have no clue about historical accuracy but it does make a lovely gown. Also I finally learned to make pretty and very silly five loop bows thanks to the American Duchess 18th century sewing book. So I took advantage of my new skill and put 5 of those puppies on my new creation.

The dress went together without any problems. Sometimes it's nice to use a familiar pattern. I also didn't need to make a new petticoat. I used the same one I made for my first Tailor's Guide dress. Score! The candy cane striped silk has been in my stash for a couple years. I was down to scraps when I finished. It is so satisfying to use stash fabric and to be happy with the result.

 I'm in love with my Dames a la Mode necklace and earrings! I decided on clear stones with a gold setting. That way I can wear other color earrings with the necklace. I am having an ongoing love affair with her Girandole earrings. They look so decadent. I felt "extra" fancy at VMB.

 Me and Ms. T. 

 In the dark ballroom at VMB

 I had my youngest take some decent photos of the new gown once I had finished it. I also did a dry run with my hair and feathers.


Feeling very queenly and super fancy!

I also purchased a "piety" brooch to wear from Queen and Cavendish on Etsy. It's quite lovely! I have a pair of earrings from her shop as well that I wore to the Outlander Ball in April. 


A bit more 18th century:
JP Ryan English Nightgown redux.

I went back and re-trimmed my first 18th century silk gown I had made for Venice is Sinking back in 2016. I wanted something less flashy that could be worn during the day or evening. I LOVE the fabric I used for this dress. Chartreuse green! One of my favorite colors. It had a lot of gold metallic trim and sequins on it plus the skirt decorations were meh... I had only worn it the one time to VIS and it has been languishing in my closet ever since.

I pulled off all the gold trim, sequins and sad little skirt bows. I had a silk rem that was pink floral striped so I pinked narrow strips and stitched them on top of the existing pink silk trim. I also replaced the sleeve ruffles and added a bow to the bodice. I love the new look! Now I just need an excuse to wear it!

 This would be for evening but I can easily add a fichu and cap for a more formal daywear look.


2016 on the left and 2019 on the right.

And last but not least it's time for a proud mama post!

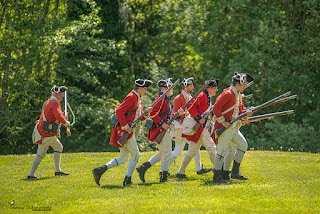
I am pleased to announce that my youngest is going to be participating in the Northwest Colonial Festival! He will be part of the Redcoat unit fighting against the Patriots during the battles of Lexington and Concord. The festival is August 8-11th at the George Washington Inn in Port Angeles, Washington.

There was a meet up last month in Port Gamble and my boy was happily accepted into the British army. At 14 he is old enough to discharge a weapon so of course he is thrilled!

 Serious picture time.

 Trying to pass muster.

 Learning to properly discharge a weapon.

 Proud mom!

Heading off to battle!