Saturday, December 24, 2016

Laughing Moon 114 1840s-1850s Victorian round dress

Pardon any typos etc.... It is Christmas Eve and I have been hitting the hard cider. Quite possibly one of the most sneak up on you drunks ever, aside from Long Island ice tea. Nothing goes better together than drinking and blogging. Because, fun.

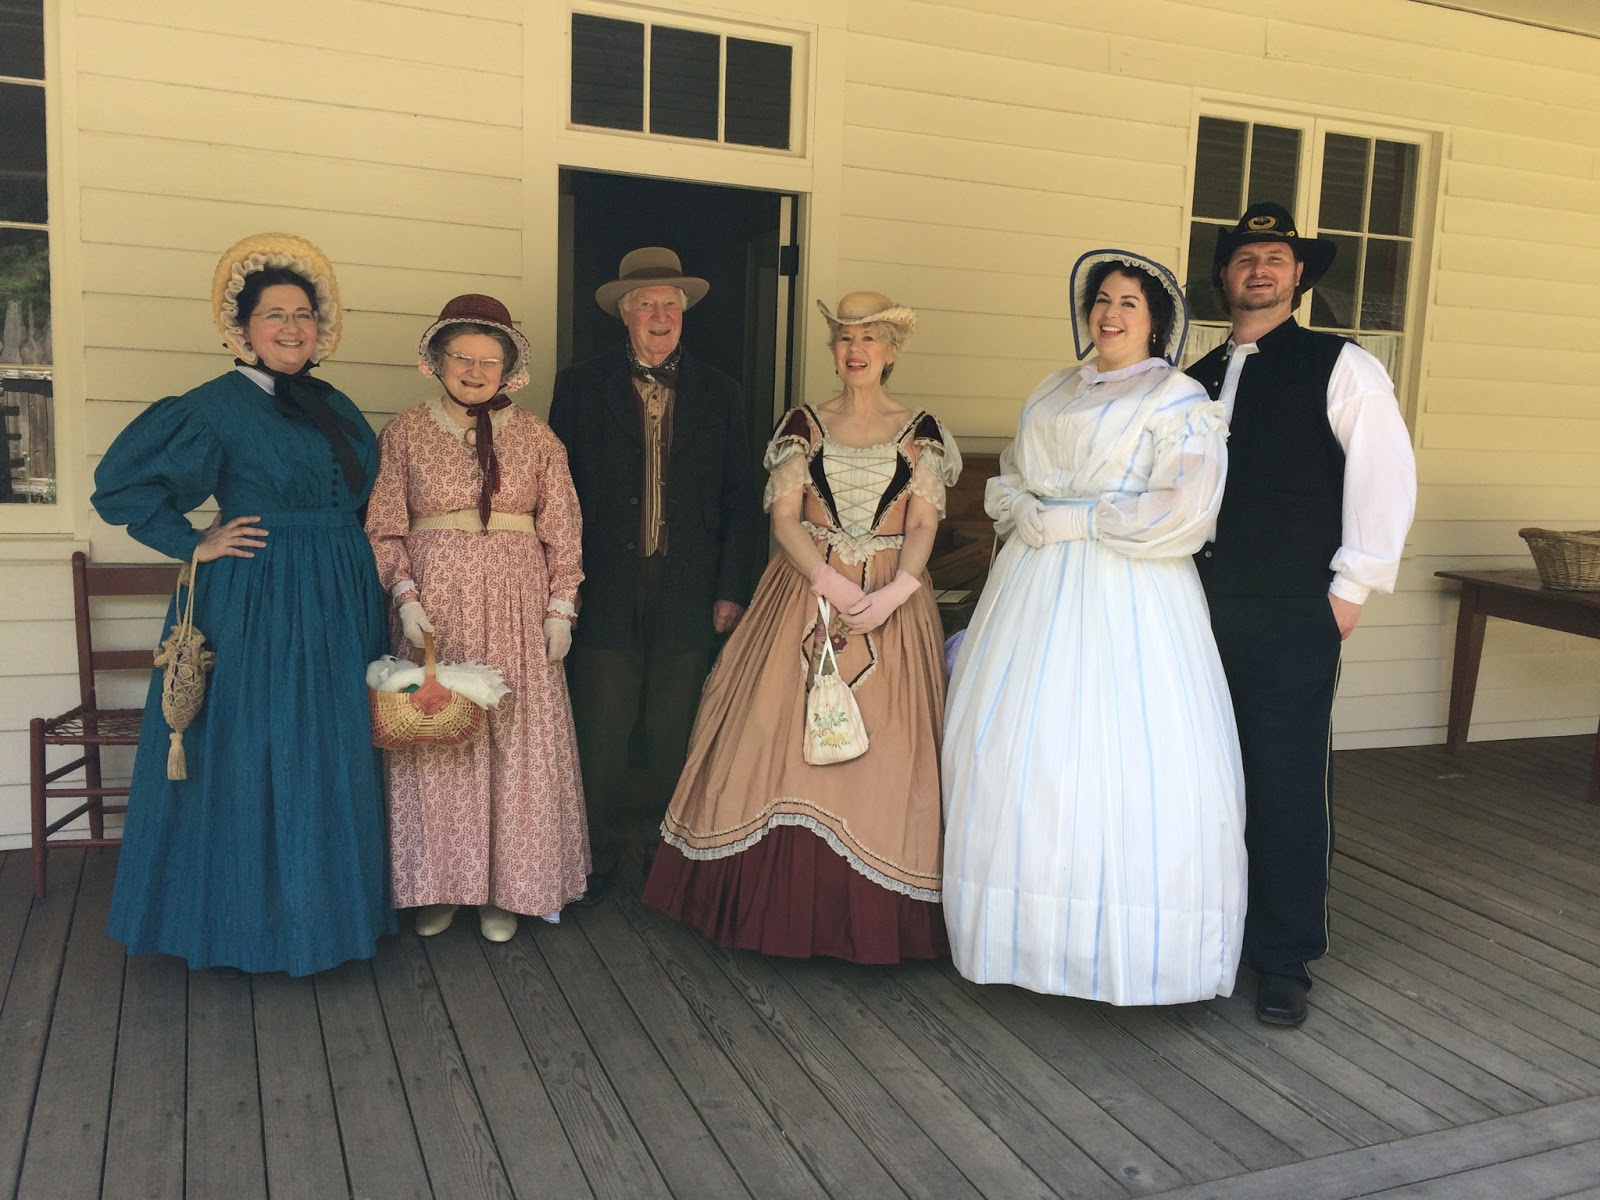
I had arranged a costume meet up at Fort Nisqually for their annual Christmas celebration. What a great excuse to finally make Laughing Moon #114! December is a very busy month for most people so it was just myself and the Countess representing SITU. Father Christmas was making an appearance at the fort as well and I am happy to say he is a personal friend of mine too. So needless to say the Countess and I were on our best behavior. (yeah right)

The pattern:

Victorian dress 1840-1852. Several bodice and sleeve styles. Skirt is gauged. I made view A with mancherons (small upper sleeve) over the bell sleeve.

Fabric:

Plaid silk voile. I believe I bought this from Fabric Mart during one of their big sales. I don't think that silk voile existed in the 1840s-50s but I am not aiming for 100% historical accuracy. Silk voile is a really wonderful fabric to work with. It has a crisper drape than cotton voile and a lovely smooth hand.

Size & alterations:

I go back and forth on LM patterns with sizing. In a corset my bust is between 42-43 inches. I have found with their Victorian styles a size 20 is a nice fit from my apex upwards. Now in Regency stays my bust is a very perky 44 inches. So I use a size 22.

Once I made the muslin I decided to make the darts smaller to add a bit more ease room across my waist and fullest part of my bust. I removed 1.5 inches from the dropped shoulder seam. This is consistent on any dress pattern with a dropped shoulder. Where I kind of screwed up was the bodice length. I made it shorter than I wanted. I was aiming for the 840s longer bodice but became over zealous and it seems more 1850s. But that's ok. I really like this dress anyway. The neckline on my muslin was too tight so I removed 1/2 an inch. I also did this with my LM wrapper. All in all the alterations were minimal.

Construction:

No issues. None. Went together a charm. The neckline, armholes and waist have piping. I really, really love to make and apply piping. Hard to believe since I hate fiddly bits on projects. Piping looks so pretty, especially in a stripe or plaid. The skirt is gauged and hand stitched on. Not my favorite thing to do. However, this time it went much better and faster than my first gauged skirt. The sleeves fit beautifully too.

End notes:

Your sleeves are bias cut, don't let them stretch out. Watch your fit in the hip area. That is how my bodice wound up shorter than I wanted. The sides were hitting on my hips in the wrong spot and made the piping go wonky. I had to rip it all out and trim off the excess from the arc that curves over the hip. And in doing so trimmed too much from the front bodice. Always leave ease room for the skirt bulk, boning, petticoats.

The Fort Nisqually event was a lot of fun. I love it when the Countess goes on adventures with me because it's always a good time.

 Feeling very festive in my holiday dress!

 Some guy crashes my picture.

 Back view. Yep, drink in all that sexy.

 The lovely Countess in her festive plaid!
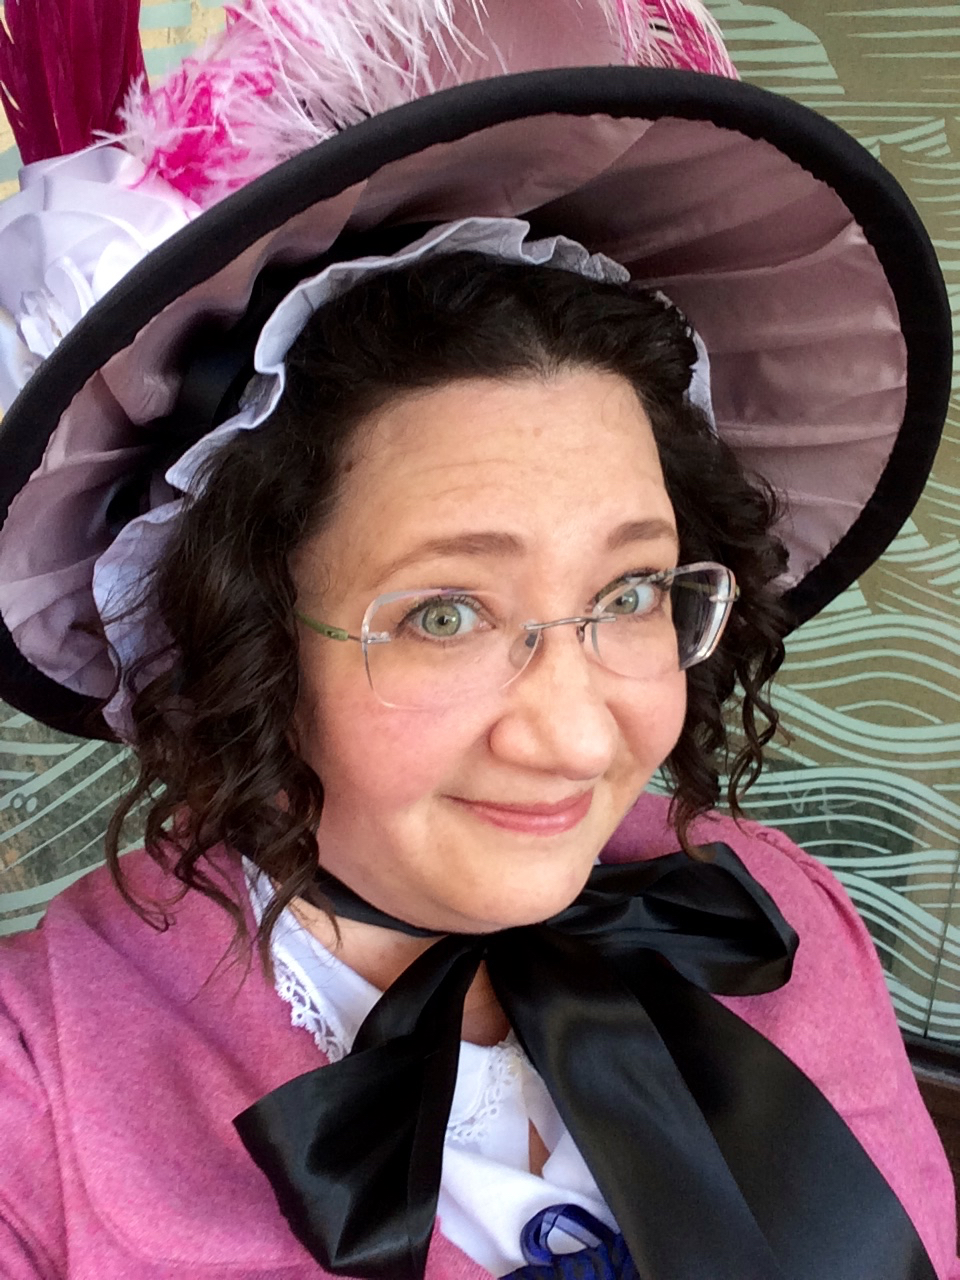
Bonnet selfie!

Me and Father Christmas! Plus my errant falling down bastard under sleeve. Oh well...

Have a wonderful holiday season! Even if it is not perfect (kind of like my under sleeve situation) enjoy it anyways!  There will be plenty more blogging and sewing in 2017!  


Sunday, December 11, 2016

1850s 1860s Isabella's Work Dress by Timeless Calico Designs

There was an upcoming Dickens Festival in Tacoma, Washington. For fun I decided to challenge myself to make a dress in a week. Because crazy. I bought this particular pattern early in 2016. It was designed for re-enactors to use. It makes up quickly and is a very simple design with a nice pay off. The pattern includes all the pieces for the bodice and skirt pocket. The skirt they give you the dimensions to cut. Just simple rectangles. The directions are easy to follow and include simple hand drawings.

Size and alterations:

Size L
Added .75 to each side seam
Removed 1 inch from dropped shoulder.
Shortened waist .75 (I am short waisted)

I landed in between sizes L-XL. My first muslin was the size L and it was a bit too tight across the fullest part of my bust. The fit in my upper chest/shoulders was really nice. So I decided to use the size L and add .75 to both side seams. I figured I could just take it in as needed. I also have to remember to allow for skirt bulk and petticoat bulk. Something I like to forget...a lot. Also, any design with a dropped should seam I take off about 1-1.5 inches. They are always way too low. I also shortened the waist by .75 inches. The sleeves run a bit short and tight at the cuff. FYI.

Fabric and construction:

A blend of wool, rayon and poly fabric stuff. This dress would be FABULOUS in a good quality plaid flannel! So TEMPTED! If you have 45 wide fabric you will need at least 7 yards. My fabric was 60 wide and I had 5.5 yards. I was left with a 14 inch piece of fabric when done. Because my fabric was 60 wide I only used two skirt panels instead of three.

The dress goes together easily. The bodice is underlined and the neckline and arm openings are trimmed with piping. The skirt is just gathered onto the bodice. I didn't add pockets to the skirt just to speed things up. This dress has no boning in the bodice. You could certainly add some to the sides if you wished.

Because the cuffs are tight I did not use a button hole and button. Instead I made a loop of round elastic and added a ball button on the other side. The sleeves just slide right on and I don't have to struggle with buttoning cuff buttons to get the sleeves on and off.

I machine stitched the hem for speedy finishing. I also used two lengths of navy blue gimp at the hem. One to cover the machine stitching and the other at the very edge of the hem. Helps give the skirt a little extra body. It was nice to use up some odds and ends I had floating around too.

End notes:

This is a really great little pattern. Makes up easily and quick. Perfect for theater, re-enactors and regular costumers. I will make it again. This dress is designed for ease of movement. If you think Victorian costumes are not comfortable and don't wear a corset then this a great alternative to Laughing Moon patterns or the Big 4 patterns. I honestly think once you get the bodice fitted you could make this in a day.

The Tacoma Dickens festival is always the 2nd Saturday in December. It is just a small event located in the Tacoma Stadium district and at the WW Seymour Botanical Conservatory.


 Good times with good friends!

 Shameless stealing of my friend's vintage fur stole. I mean, it's called a stole, right?
So I stole it!
 Koi!

 The Poinsettia God, Steve.

 Shameless selfie in the horseless carriage!

It was cold, windy and rainy outside. I made this lovely hood to keep warm. Pattern by Anna Worden Bauersmith. Available on Etsy as a PDF. Nice pattern with good instructions!

Cap--Miller's Millinery pattern 2012-1. Technically a Regency cap but I don't care. :-) A very easy make. I made it by machine and just serged the edges and narrow hemmed them. Easy Peasy. Then just put a bow on it!

Saturday, November 26, 2016

Wingeo WN719 Regency Stovepipe Bonnet

I really love this hat. I need another. This has a similar look to a 20s cloche except it is much taller. I can rock a 20s cloche and think this hat is looking pretty fine on my head! On to the pattern!

Eh........I have other patterns by Wingeo. Their patterns are pretty basic and instructions minimal. I consider their patterns more for theater level costuming. Their clothing patterns tend to have overly large arm openings and lots of ease. This hat was no different.

Pattern Info:
Three piece pattern, crown, hat body and brim. There are separate pieces for the hat fabric with added seam allowances. The directions are printed on the pattern paper, no separate pages.

Supplies used:
Heavy buckram, silk fabric, cotton batting (mull) and heavy sew in interfacing for the brim. The pattern does not call for mull at all. I used it as my main fabric that goes under the gathered fabric. Why waste good fabric no one will see anyway. This pattern does not use wire.

Making the hat:
Think of this pattern as a guide with pieces. As far as sizing goes you are on your own. First off this hat comes in several sizes. S-L. This hat runs really large. Now that being said, just like a cloche this hat needs to fit down on your head. You will want some ease room. Make a muslin. I used the size medium and I can fit a finger up inside the hat when I am wearing it. I have a 23 inch head FYI. My first hint of an issue is when I noticed the crown was smaller then the hat body. I went to sew it on and I had about an inch of excess hat body. Its buckram, not like I'm gonna be able to ease it. So I had to make the hat body an inch smaller. Luckily this pattern is large to begin with. Got the crown attached and the hat still fit. Yay! I used the batting to mull my really crappy looking buckram hat form. It was pretty sad looking. Once it was mulled I decided to forgo the sparse instructions and lay some Lynn McMasters style all up in that bitch. I gathered up the crown fabric and hand stitched it to the hat. Then I gathered up the hat body, folded in the top seam allowance and hand stitched in to the crown and basted it at the bottom. Well you know when you change the size of the hat body you are going to be changing the brim size too. Did that. I hand stitched on the brim as well. This pattern calls for no lining at all or a hat band. You fold up the under brim and stitch it inside the hat. Yeah no. I cut a lining piece using the pattern piece for the hat body. Folded up the SA and stitched it in the hat. I put a drawstring at the top of the lining and gathered it up. You can only see a bit of the buckram crown when you look inside the hat. Then decorating!! Have fun!

Notes and advice:
As you are making the hat try it on periodically. You will probably need to make adjustments. Lol. Even the instructions tell you to adjust before attaching this or that. I knew I was on my own at that point.
Cut the crown at the largest size, you can always trim it to fit.
Use a good quality heavy sew in interfacing for the brim. I used Sew Lazy heavy sew in.
I would recommend mulling the hat crown and body with flannel or batting.
Sew most of it by hand. I only used the machine to gather the hat fabric.
Make a lining, your head will thank you.
Cut out your brim as usual. I pinned it and started stitching at the CF. First to the right then to the left. I stopped about 1.5 inches from the CB on each side. Then I could see where my adjusted brim seam needed to be. Stitched the brim seam and finished attaching it to the hat. No guess work or math. Easy Peasy.

Final thoughts:
I am really glad I stuck with it. As I was putting it together I was thinking "wow, this is ugly". It's really not. I love my new ridiculous Regency hat!


Thursday, November 24, 2016

Lynn McMasters 1840-1850s Victorian Bonnet Pattern

I have a serious love of 1840s fashion. There is such a gothic flavor to that era. I am probably heavily influenced by having read Jane Eyre in my younger years. I also think it is caused by looking at somber photographs of women with severe hairstyles and tightly buttoned gowns. I am inclined to day dream of leaden skies, thick fog and hearing the clip clop of the carriage horses on the cobbled streets. But don't be fooled by my gothic love affair. There were plenty of colors and patterns in that era. I am just a goth at heart so leave me to my glum Victorian fantasy. Onward to the bonnets!

The Lynn McMasters pattern spans 1840s-1850s. It has 3 brim styles and the bonnet itself is 2 pieces. I made the 1840s version.

Construction:

You will want to trace off the pattern because for the fabric and mull (flannel or cotton batting) you will need to add 3/4 seam allowances.

The bonnet frame goes together easily. I have accepted the fact that bonnets are easier to do by hand. In my crazy mind I figured I would go ahead and make two, just for fun. So I hand stitched all the wire around the brim and tip. Time consuming but worth it. I use buttonhole twist and a sturdy millinery needle. You then cover the wire with bias tape using glue or hand stitching.

Once you are finished sewing and covering the wire on the 2 pieces of buckram it's time to stitch the main brim seam. This is a bit fussy with the curve and having to overlap the wires. I had to futz with it quite a bit. Then you sew the tip (round piece) to the brim. Easy peasy. Then you mull the tip and brim with flannel or batting. All was going swimmingly until it was time to cover the brim with fabric. My fabric piece was too small!!! Not along the front curved edge of the brim. It was too small at the back seam and the part of the bonnet that fits around your neck. I went back and looked at my pattern and the traced off pieces. Did I forget the S/A? No. The mull did fit along that edge, but just barely. Was I supposed to cut the brim fabric on the bias? Nope. A quick muslin showed me a stretched out droopy mess. So I went back and added an additional 1.5 inches to the back seam and neck curve of the brim fabric piece. That did the trick. Once I had all that figured out the rest of the bonnet went together quickly.

Trim, trim and more trim. Do whatever makes you happy! Flowers, feathers, ribbon, lace. I do cheat in use hot glue for most of my trims. Except feathers. I may want to use them again.

Final thoughts:

Even though it is only 2 pattern pieces I wouldn't recommend this for a beginner. That curved wire join was a bitch.
In the instructions she says to cut 3 pieces of wire for the bonnet. 1 for the tip and 2 for the brim. The brim has 3 sides...Also I wasn't sure if I was supposed to cut the wire into 3 pieces for the brim or bend it around the edges. I decided to cut it. Worked fine.
Even with proper S/A added the main fabric piece was too small. Make it bigger, drape it and trim away the extra.

I really like the shape of my bonnets. There is lots of empty space in the back area when worn to hide a flask or snacks.


Monday, November 7, 2016

Yay! Washington Regency Society Hunt Tea & Laughing Moon patterns 129 130 & 126

WRS had a fabulous high tea in Seattle. It was a gorgeous day and a really fun event! It seems like I am making a Regency wardrobe even though I never thought I would wear Regency. I am actually enjoying it! Plus it is really fun to make and doesn't take up as much fabric as some of the other eras.

Laughing moon #129/130 a mash up:

I wanted to make a 3/4 length fur trimmed pelisse for the tea. Thinking it would be cold (it wasn't). Plus I knew I would be commuting via bus. Yes, I was out in public, in costume, riding on the bus. It was Sunday morning and quiet. Just me and a couple drunks who probably thought they were hallucinating. I decided to use the spencer pattern from #129 (view B) and the skirt pattern from #130 (view C).

Pattern sizing and alterations:

LM Regency patterns I wear a size 22. In my stays my bust measures 44 and under bust measures 39. I shorten the bodice by 1/2 inch. The sleeves are VERY long. Part of this is a fashion style of the Regency era. But I am a bit more practical so I shortened my sleeves 1.5 inches. I was being conservative in my sleeve alterations because I wanted them to still have the overly long look of the era. That was all I did to the pattern. Simple and quick.

Sewing it up:

Very easy. This does not take overly long to make. I had zero issues with either set of instructions. No complaints. My next project will be a grey velveteen spencer.

Fabric and other details:

I used a lightweight wool suiting in mauve pink. I bought it from Vogue fabrics 2-3 years ago. I only bought 3 yards so I had barely enough to put this together. It is lined in mauve cotton sateen. I made two self fabric straps for the lower sleeves to tighten them up a bit. They are just tacked to the front and back of the sleeves. For the faux fur trim I cut strips of the faux fur and some black cotton. Both 6 inches wide by about 60 inches long. I sewed them right sides together making a fur/cotton tube. Once it was turned right sides out I hand tacked it to the hem. A bit time consuming but it turned out ok. My hand work is nothing to write home about, but I manage. I love this pelisse. It is such a happy color and a nice weight of wool.

Laughing Moon #126 drop front dress:

Well of course I needed a new dress for the tea party! Actually I only had one Regency dress so making another didn't seem too frivolous.

Pattern sizing and alterations:

Again, size 22. I chose the heavily gathered bodice instead of the less gathered one. My cotton Regency dress uses the less gathered one. I shortened the bodice 1/2 inch and the sleeves I shortened 1 inch. No other alterations.

Fabric and other details:

I had some royal blue and black checked silk taffeta. I had originally bought it for a Titanic era dress. Oh well. The long puff sleeve is actually 2 pieces. You make the puff sleeve and  then baste the long sleeve up inside the puff sleeve band. This way they are removable and you can change the look of your dress. How convenient! The dress went together easily and I had no issues with the directions.

Sewing crumbs of advice:

On the drop front dress I put 3 belt carriers on each side. It is easy to get kind of a rectangular shape in this dress due to the front/side front of the skirt sagging a bit. I found that 3 carriers on each side really helps with this issue. My first carrier is laced 2.5 inches in from the side front and the bottom of the carriers are placed on the waist seam. Also press the side panel pleats as flat as possible.

Oh the bonnet!! 

This is one of Lynn McMasters patterns for Regency bonnets. I used silk remnants, feathers and wide ribbon. I made the size large because I have a giant head. I would recommend some  hat making experience before making this one.


 Oh how I love the back pleats on a regency gown!


Waiting for Mr. Metro, who is much more reliable than Mr Wickham.


 Trying to do up my blasted pelisse!!


Some of the WRS ladies!

Oh! My! Goodness! Not a proper lady and never to be trusted around the Regiments.

Saturday, November 5, 2016

Simplicity Retro 9247 1950s formal dress

This pattern is long out of print. There are similar patterns out there for this style dress.

Simplicity 9247 1950s prom dress AKA the Liz Taylor- A Place in the Sun dress. One of the views has the bodice top covered in small flowers. Just like Liz's dress in the movie. I am sure many a young woman wanted that exact dress for Senior prom. I did not make the floral bosom view. I need no enhancements up top thankyouverymuch.

EMP in Seattle had a great Halloween party and the theme was Undead Prom. I knew I wanted a fluffy 50s prom dress! Even when I was thinner vintage 50s net prom dresses were never in my size. So here was my chance to live the dream!

Dress details:

I made View B, no fluff on the bodice and a tea length skirt. What inspired me to make this dress was a really fun Halloween netting I found at JoAnns. It was a black and silver metallic novelty netting with flocked velvet half moons and stars. So cute! The main gown fabric (under bodice & underskirt) was a changeable silk taffeta. This was a nice stash buster project for me. I had originally bought this for a bustle dress but It just didn't jibe once I received the fabric. Underneath the netting it really added a nice pop of color. The two other fabrics were lavender netting and lavender tulle. Bodice is fully boned and is three layers of fabric plus separate lining. 1st layer novelty netting, 2nd layer lavender netting, 3rd layer silk. The first two layers are not ruched. The topmost layer (novelty netting) is ruched to fit the bodice pieces on the front of the dress. The skirt is four layers of fabric---1st layer novelty netting, 2nd & 3rd layers tulle, 4th layer silk.

Fitting and construction:

I have never fitted a strapless bodice before. I decided to use the largest size (20) 44 inch bust. I knew it would probably be a bit big in the bust area but I also had to consider my waist measurement (36). I made a muslin of the bodice and used a bra similar to what I would wear with the dress. I was still in flux about undergarments. Unable to find a comfortable strapless bra. The fit of the muslin was good except for the apex upwards in the front. I had to bring in the seam allowance about an inch so the bodice would curve over the top of my bust and not pop away from it. A common problem I notice in strapless dresses on busty gals. Once I had all the upper bust kinks worked out I was good to go.

This is an easy dress to put together. There were no issues with the instructions.

Conclusion:

Easy make once you have it fitted. The skirt is a lot of fabric squeezed into a small area. If you are on the smaller side you may want to make your skirt panels smaller in width because there is no difference in the panel measurements between sizes.. It was a struggle for me to fit all that fabric to the bodice waist. The other problem with all that fabric is it made my waist look bigger than it already is. I decided to make a sash and a matching bolero. The sash helped pull in the waist and give it definition. The bolero provided me with additional coverage because strapless isn't really my thing.

Additional information and tips:

Make a waist stay! Please make a waist stay! It helps when you put on the dress and have a side zipper. Makes it much easier to zip up. Also, and this is the most important thing, it helps keep the dress up. Nothing ruins a lovely lady in a pretty dress like watching her spend the evening pulling it up every 5 minutes. I see so many young ladies in their prom finery walking around hiking up their dresses. If you buy a strapless formal and it doesn't have a waist stay tape please find someone to put one in. Gertie (Patterns by Gertie, Butterick) is all about the waist stays. So important. I danced the night away and I had no need to pull up my dress.

Undergarments AKA finally found something:

After much searching for a comfortable strapless bra (never happened) I went to good ole JC Pennys online. There under the "granny lingerie collection AKA shit my mom wore in olden times" was a glorious lace long line bra. I also call these a merry widow. I decided to go up one band size just in case. It arrived in a week and the fit was very nice. The cups were stiff but not as supportive as I needed so I stuffed some silicone chicken cutlets into the bottom of the cups. I know, sounds amazingly sexy....Worked a charm. The added bonus was the bra's crisp lace overlay provided extra grip and helped keep the dress in place.

The party was fantastic! Made even better because it was a girls night out with my best friend! So much fun, so much dancing!

Bolero is Simplicity 1819 with no sleeve ruffle. 

 Bringing the sexy to Star Trek.

Me -n- Lady T!

 Main entrance.
 There be dragons...

Random photo.

Friday, October 21, 2016

Simplicity 4551 Historical Fashion Pattern Civil War era Dress

I can't believe I didn't write a review on this for my blog. In May we had a Queen Victoria's birthday event at Fort Nisqually. I don't normally do 1830s-1860s. However I do like the gothic severeness of the 1840s.

So on to Simplicity 4551 which is supposed to be a Civil War era dress. There was some contention about the sleeve style among a few of my costuming peeps. Some felt they looked like 1830s gigot sleeves. But there are some CDV's on Pinterest that do show similar sleeves being worn during the 1850s-60s. Nevertheless I was going to make the dress as is. So here is the review.


Simplicity 4551 Victorian Dress 1850s 1860s, or something like that. Ok so admittedly this is not my era. But I decided to step outside my comfort zone and now I have a mid Victorian dress to wear if needed. I used roller cotton print that looks like moire silk.
Fitting: Corset measurements, 43-36-43 (yeah I know! Almost Marilyn Monroe territory!! Completely ignore the bust measurements on the size chart. This dress has a fitted under bodice so I went by the finished measurements on the pattern pieces. I cut size 16 shoulders and 18 sides. The fitted under bodice has A LOT of ease built in. Too much for it's job of being a fitted under bodice. I avoided most of that by cutting the smaller size. I made 2 alterations. First the shoulder fell way to low on me. So I trimmed a good 1.5 inches off the top of the arm opening. The sleeve seams still falls low, as it should but not ridiculously so. The Big 4 figures the larger size you are the broader your shoulder must be. Nope. I knew the waist would be too small so I added 2 inches to the side seam on the front bodice only, nothing on the back. I need all my extra room across the front. The back was a nice fit. 
Construction:
This is where 4551 falls into my not recommended category. All was going swimmingly until I got to attaching the skirt to the bodice. Their instructions were very confusing. The dress buttons down the center but the skirt opens on the left side front. Their diagram was poorly drawn and if I was a novice I would have packed it in. But I was determined and I finally figured it out. The skirt required cartridge pleating. This has to be done by hand. Not difficult, just tedious. I did manage to get more pleats on the right side than the left. But it was my first time so... I had to play with the sleeve pleats to get them to fit properly. But pleats are meant to be shuffled for the proper fit. All our shoulders are different shapes.
Conclusion:
I am glad I stuck with it. I won't make this pattern again. I think there are others out there that would be hella less confusing. If you really want to make this keep the bodice and the skirt separate. Then you can skip all the grief I struggled with.